
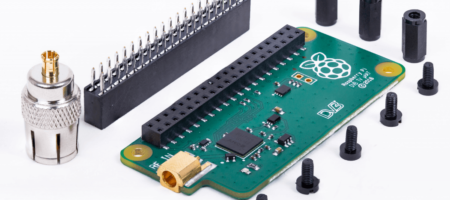
How to Connect Raspberry Pi with Laptop – Headless Setup
Think of carrying a Keyboard, Display and Mouse separately for a small Raspberry Pi. It’s little odd right?. There is an option to use your own laptop hardware (Keyboard, Mouse and Display) with the Raspberry Pi. This guide will help you to get it done. Using Ethernet cable (No Router needed) you can directly connect the Raspberry pi with the laptop’s Ethernet port. There is a protocol called SSH (Secure Shell) which is a cryptographic network protocol to operate network services securely over an unsecured Network. The VNC – Virtual Network Computing is used to remotely control Raspberry Pi through another computer. Let’s see how to use all of these to use your raspberry pi with the laptop. If you have any questions and doubts use the comment section below.
Hardware:
- Raspberry Pi
- Ethernet Cable
- 16GB MicroSD card
- USB Cable for power supply
Buy Raspberry Pi 3B+ Complete Kit
Software:
These are the links to the software that we have used.
- Raspbian OS (Raspbian Stretch)
- SD Card Formatter
- Sublime Text or Notepad++
- Win32 Disk Imager or Etcher
- Putty
- VNC Viewer app for Google Chrome
Attention: If your Raspberry Pi has Wi-Fi then you can access it in Wireless way (No Ethernet cable needed). Check the following tutorial for Headless Wi-Fi Setup or continue for Headless setup with Ethernet:
How to Setup Raspberry Pi Headless – WiFi
Raspberry Pi Zero W Headless setup – Windows 10 RNDIS Driver issue resolved
Connect Raspberry Pi with Mobile Screen | Android | VNC Viewer
Step 1: Format the SD card with SD card formatter.

Step 2: After formatting open Win32 Disk Imager (or Etcher), locate the downloaded Raspbian image file and flash it to the SD Card.

Note: NOOBs will not work with this set up (NOOBs is Just an OS installer). So, we need Raspbian. The Current version while writing this is Raspbian Stretch (Get Latest OS – Download Here). A Raspbian OS is an image file with the ‘.img’ extension (It comes with ‘.zip’ file you have to extract it before flashing).
Step 3: Once flashing done. Navigate to the SD Card folder. You can able to see the files extracted from the image.

Step 4: Duplicate the ‘cmdline.txt’ file and rename it to ‘cmdline.normal’. Now we have both ‘cmdline.txt’ and ‘cmdline.normal’. You can toggle back to the old version by just swapping the filenames.
Step 5: Now open ‘cmdline.txt’ file and add the IP address at the end of the file. (Be sure there is no space or newline after that. Use Notepad++ or Sublime text to identify if you did any newline added).
For network settings where the IP is obtained automatically use this IP Address
ip=169.254.0.2
For Network settings where IP address is fixed use the same IP Address of the computer except the last byte. (Changing other bytes won’t work)
Example: If your computer IP Address is
ip=192.168.0.1
Then change the last byte from 1 to 2 (anything till 254). Like this
ip=192.168.0.2
Here on my computer the IP address is obtained automatically. So I’m using ‘ip=169.254.0.2’.

Step 6: Note down the IP address which you given. Now duplicate the ‘cmdline.txt’ and rename it to ‘cmdline.direct’.
Note: The only important file is ‘cmdline.txt’. The other files are just for the backup purpose only.
Step 7: Now create an empty file called ‘ssh’ without any extension. Make sure the file name extensions option is selected in windows view settings.

Enable file name extensions in view tab.

Empty ssh file to enable SSH in Raspberry Pi.
Step 8: Eject the microSD card from the computer and place it in the Raspberry Pi. Then connect the PC and Raspberry Pi via Ethernet cable. Then connect USB cable for power supply. Wait until the pi boots up completely. It might take up to 90 Seconds. You can notice the ACT LED (Shows SD card activity) on the raspberry pi until it stops blinking frequently.
Step 9: Open Putty on your PC and enter the IP address 169.254.0.2 (raspberry pi IP) and port as 22. Click open, this will open a terminal and ask for username and password.

Step 10: Enter the default username as ‘pi’ and default password as ‘raspberry’.

Step 11: Now type vncserver in the terminal window. This will run the virtual server on the raspberry pi. So that, you can access the Pi.

Step 12: Now go to Google Chrome and open VNC Viewer App (You need to install from google apps or visit website). Enter the IP Address of raspberry pi with :1 at end of the IP. Like this ‘169.254.0.2:1’

Step 13: Now enter the Pi username and password then click connect. The default username is ‘pi’. The default password is ‘raspberry’.

Step 14: Congrats! You can access the raspberry pi desktop screen on your laptop. You can use your PC’s Keyboard, Mouse and Display with your Raspberry Pi Virtually.

Share this post
Leave a Reply
You must be logged in to post a comment.


Comments (10)
We proceed with the same steps you showed.but putty always show network error and connection refused…
Please give a solution to us
You can install Bonjour from Apple to automatically map your IP Address to hostname ‘raspberrypi.local’. So if your Pi is not configured with correct IP it will detect & map automatically. Link to Bonjour Service – https://support.apple.com/kb/DL999?locale=en_US
You can use Advanced IP Scanner to check the Pi’s IP is assigned or not. Check Step 4 in the Headless Wi-Fi Blog to know how to use Advanced IP Scanner Blog Link – https://www.factoryforward.com/raspberry-pi-headless-wifi-setup/
You can use the Headless Wi-Fi Method if you feel hard using this hardcode IP method. The Wi-Fi Method is easy and no need for any extra cables and also be accessed using your Android Phone also (with VNC Viewer App).
Other Troubleshooting:
1. Make sure the SSH file is still in the SD Card. Because sometimes it gets deleted if you are not able to connect via SSH on Pi and again put into PC.
2. Make Sure In Step 5 all the text are in a single line (see picture) on cmdline.txt file. Use sublime text for easier identification.
3. Wait for sometime to the Pi Boots up completely. Also, the connection refused error will happen mostly because of SSH File is missing. Check the filename should be only ‘ssh’ and without any filename like ‘ssh.txt’. Make note of the missing SSH file in 1st troubleshoot also.
From step 9 and forward, is that happening on the raspberry or on the laptop ?
Everything happening until the Step 13 is on your Windows PC. At Step 14 only you can able to see your Raspberry Pi Desktop Screen.
step7 ssh file created in sd card.
after put rpi network time out.
then put sd card in laptop
this ssh file not in sd card
why?
For security purpose they did like that. You must have to add it again after boot (once successfully ssh, you don’t need to do again).
Chances are there someone can add ssh file and access your pi without your knowledge. This is one of the reason for that. For this reason once boot up it shows warning to change username and password.
thank-you
now connected
thanks for your valuable information.
Guys, If you are using Pi with Wi-Fi, you can easily ssh with Wi-Fi – Check the tutorial here – https://www.factoryforward.com/raspberry-pi-headless-wifi-setup/
Thanks a lot sir. I was struggling, sharing this detailed procedure saved me. Good continuation !
thanks a lot bro….just to the point instructions…i was so confused at last my raspberry booted in a one go with your instructions.