
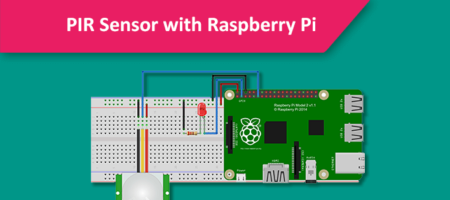
Getting Started with Raspberry Pi GPIO Programming using Python
Raspberry Pi is a Single Board Computer with many features for Makers and Hobbyists. The Raspberry Pi Board has GPIO Pins for connecting it with external devices like LED, HATs, Display, Mic, Sensors, etc.
Python is a High-Level Programming Language for General Purpose Programming. The Raspbian Operating System itself included Python along with GPIO packages for getting started. If the GPIO package is not included in the operating system you can install it manually by using the following command.
sudo pip install RPi.GPIO
For some Raspbian Lite Versions, the Python 3 is not included. To install Python3 manually on Raspbian, use the following command.
sudo apt-get install python3
The RPi.GPIO is a package for accessing the Raspberry Pi GPIO Pins. The numbering for these GPIO Pins are followed in two styles
- BOARD – Physical Numbering
- BCM – Broadcom Numbering
Generally, most of us prefer Physical Numbering as it is easy to identify. The Broadcom Numbering needs to be verified with the Raspberry Pi GPIO datasheet according to the Raspberry Pi Models.
Raspberry Pi GPIO Pinout (40-Pin):
 You can see this pinout on the Raspberry Pi Terminal window also. To see pinout of Raspberry Pi, open terminal and type ‘pinout’
pinout
To learn more about GPIO visit raspberrypi.org
For detailed and additional functions of Raspberry Pi GPIO Pins Visit https://pinout.xyz/
The basic structure of GPIO Python program:
Step 1: Import the RPi.GPIO Package.
Example:
import RPi.GPIO as GPIO
Step 2: Choose your numbering style (BOARD or BCM) using GPIO.setmode().
Example:
GPIO.setmode(GPIO.BOARD)
Step 3: Setup the Pin numbers for Input or Outputs.
Example:
int ledPin = 7

GPIO.setup(ledPin, GPIO.OUT) # Pin7 set as output
Step 4: Read the input from pins or output to the Pins.
Example:
GPIO.output(ledPin, GPIO.HIGH)
Step 5: Clean up the Pin Setup using GPIO.cleanup(). This function is used to clean up the pin before exiting the program. Else it might cause an error in another program. You can also use it without cleanup, but it will show some warning in the program.
GPIO.cleanup()
Simple LED Blink Program using Python:
import RPi.GPIO as GPIO       # Import GPIO library

import time

int ledPin = 7

GPIO.setmode(GPIO.BOARD)      # GPIO Physical Numbering

GPIO.setup(7, GPIO.OUT)      # Setup GPIO Pin 7 to OUT

while True:

     GPIO.output(ledPin,True)  ## Turn on Led

     time.sleep(1)         ## Wait for one second

     GPIO.output(ledPin,False) ## Turn off Led

     time.sleep(1)         ## Wait for one second


Leave a Reply
You must be logged in to post a comment.